Tag Archives: Equipment

Current Tank List :  July 12, 2014 (1145.5 Gallons of Fish in Tanks).

(89) Tanks (1194.5 Gallons of Fish Tanks)

  • (4) 55 gallon Tanks  (220 Gallons) (2) were donations (1) Bought from Petco; (1) Bought from Johns pond (1) 55 gallon Tank still with broken glass; haven’t found a replacement piece  of glass yet!
  • (1) 30 Gallon Tank (30 Gallons), Donation from Neighbor
  • (10) 20 gallon long Tanks  (200 Gallons) Most bought from Petco; (1) From Johns pond (1) New Bought From Petco
  • (21) 5.5 gallon Tanks  (115.5 Gallons);Many Bought from Petco; (1) were Bought from Johns pond; (1) was bought from yard sale. 2 New Bought From Petco
  • (58) 10 gallon Tanks  (580 Gallons) Many were donations; Some  Bought from Petco; some were Bought from Johns pond; Some were bought from yard sales; 2 New Bought From Petco 
  • Space for (2) more 20 gallon long tanks.

Water Quality Testing Equipment

I was thinking about retesting my water toady and though people would be interested in what test equipment I have. I am not going to get into water testing but just the equipment I use for doing it “Water testing”.

Fisrt I use a standard liquid test kit from API ” :

API Freshwater Master Test Kit

4c0fb4f8ce4b0

API Freshwater Master Test Kit – Price $20.99 – From Kens’ Fish


Test kit card

API Freshwater Master Test Kit Range Sheet


This kit can be bought from Ken’s Fish.com for $ 20.99 plus shipping. You can probably find it cheaper on E BAY, but make sure you know who you are buying it from, and is it NEW!

Next I use a TDS Meter for detecting Total Dissolved Solids, in the water. I also purchased a HM Digital pH Hand held Meter to check the pH of the water!

HMDPHM80 Digital pH_Temperature Meter

HM Digital TDS Meter – Hand held – Price $22.99 – Amazon.com

7124GU4AgbL._SL1500_

HM Digital pH Meter – hand held – Price: $49.95

After I installed my RO water system I needed to check the conductivity of the RO water so I purchased a Hand Held Conductivity Meter from E BAY.

HM Digital EC-3 Conductivity Tester Meter, w/ Case NEW - price $ 22.20 - From EBAY

HM Digital EC-3 Conductivity Tester Meter, w/ Case NEW – price $ 22.20 – From E BAY

So for Less than $125.00 you can have a complete water testing system for your Freshwater fish Aquarium.


Breaking Down And Cleaning a Tank

I was recently asked how I cleaned and disinfected my tanks so her it goes.

When I break down a tank, I empty the water of course, then rinse it in the sink with my pressure spray gun. Image

I then pour some aquarium salt into the tank and scrub it with a green scrub pad or nylon scrounge. I then rinse it again, then I put H2O2 in with the nozzle cap hitting all the sides. then fill it with water about 2″ in the bottom and use another green scrub pad to make sure the solution covers all the surfaces.

ImageImage

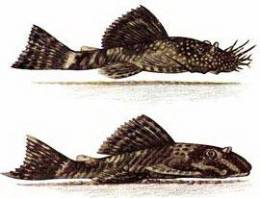
My tanks don’t have much green algae but some do. When they do I scrub them with the scrub pad and remove the algae. If you keep tanks with BN Pleco’s you won’t have much of an algae problem if any. One BN Pleco can clean the algae in a 10 gallon tank in about 2 days. Then keep it away indefinitely.
Image
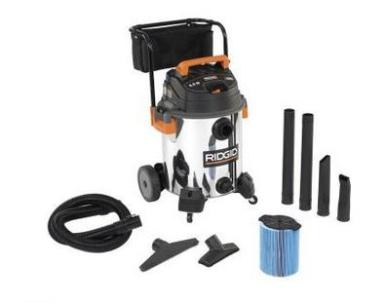
I do clean my 55 gallon Tanks like that, but instead of dumping them I clean them in place with the use of a wet dry vacuum, to remove rinse water. I have (2) different brands that i bought from Home Depot. It doesn’t matter if I don’t rinse them well to remove all H2O2, cause its not toxic at that strength to the fish.

ImageImage

Yeh! and I don’t do large tanks, my 55 gallon that have gravel, is all I can handle, at my age. I leave those tanks to the younger people. I find myself struggling with a 20 gallon long tank. Also I don’t use any substrate in my tanks just gravel, but most of my (90) tanks in my fish room are bare bottom BB. I don’t have any display tanks. No one ever comes to look at my fish anyways, except me, so I don’t care about fancy plants and such, just breeding and maintaining the varied species that I raise.

Video

New Fish Room Videos – June 03, 2014

I spent all morning long cleaning the insides and outside of my tanks, so they would be clean to make the videos. As you know its so hard to keep the water spots off the face of the tank. As I made a new fish room video, I then realized it only showed the tanks individually and not as a  whole, so I am going to make a second video explaining what you see in the background or the entire fish room. Then you can look at the tanks indivdually #2.

Remenber I am not a professional or even amature photographer. I had to use my old camera, because the new one I found out did not have sound. It was a $100.00 or so to buy a sound adapter, bla! bla! bla! Anyways here is my videos. Yes its me talking on the video expalining what I am doing. Ididn’t know how bad my voice sounds (to Me)!

Ron’s Fish Room June 3, 2014 New Video #1

Ron’s Fish Room June 3, 2014 New Video #2

I made one big mistake on my video when it came to my Ilyodon colony. I kept calling them Ilyodon lennoni actually the first fish I showed were Ilydon xantusi, the second 55 breeding tank was Ilyodon furcidens, and at the end I was going to go back and show you the 20 gallon long with the Ilyodon lennoni, but never did, so you don’t see that tank at all.

“Poll Results” Posted”

Info gathered from the TBA(Tampa Bay Aquarium Society) forum members, blog followers and search engine links!

Type of Tank Acquire Tropical Fish Acquire Tropical Fish Food How many tanks Live Food Tank Size Tropical Fish Purchased

“Tropical Fish Survey & Poll”

“Tropical Fish Survey & Poll”.

“Teaser Pics” Ron’s Fish Room

Here are some teaser picture of my “Fish Room” for you to look at until I get my new Video up and running. Enjoy!


“Fish Room Renovations”

I ran into some problems with my wet sink the other day. Just as it says “wet Sink”. I was spilling too much water behind the sink and on the floor. I don’t have a floor drain, but just squeegee the spilled water to the front of the “garage” fish room and it flows away under the door.

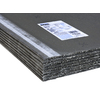
Well I looked behind the sink and under the two fish racks on either side and voila “Mold” big black nasty spots of growing mold, even some of the floor tile were warped from the mold. Bad!but not as bad as it sounds, but bad enough. I had to rip out the sink and the racks on either side. Now what to do, the mold had grown up the sheet rock about 6″ and was black and gushy! I had to rip it out,  so I spent all day Saturday tearing out sheet rock, cleaning up and getting rid of the mold and treating the mold spots with mold inhibitor. Luckily it had not gone into the house area, which is behind the master bath. I checked it all out and it was clean. So I decided to put “Cement Board” up on the walls. (see pic) Perma Base 1/2-in x 3-ft x 5-ft Cement Board $8.88 per sheet I need 2 1/3 sheets to complete the job. The other two thirds I am going to use as replacement shelves in the fish room (18″ x 48″).

022332024677sm

About the old shelves, they are all moldy also, from getting wet from the tanks. They were constructed out of particle board. I covered them with contact paper, but they were not durable enough to last a long time. They got rips and tears in them, causing wet spots leaking through causing moldy areas and warping.  I will tell you how I am going to use these “Cement Board” shelves in another blog.

Back to the “Mess” after putting the cement board on the walls and sealing them with silicon, water proof screws and construction adhesive, I was done with the preliminarys . No what to do to cover the cement board! I suddenly remembered that I was given some ceramic tiles that were sitting in the corner of my “Garage” fish room. I pulled them out and Yeh! the boxes they were in were moldy too. I got rid of the boxes and counted the tiles.  I had enough to do the back wall, but I wasn’t sure of the side wall. So I decide to use them and see how far they would go. I actually found the tiles when I was cleaning up the “Fish Room” so I can do another video for the blog, of the “Fish Room” expansion since the last. The old Video is just that “old” only 40 tanks! I now have closer to 100. I so will be putting one up soon.

Here is the wall after putting on the tiles!    I know they are not all the same color tiles but now one will see them  when I put the sink back and the tanks are put back on each side. The top one will show, but not the bottom rows. Now it is water and mold proof!

Pics_05-22-2014 003

Pics_05-22-2014 004 Pics_05-22-2014 002

Retrofitting Your Garage For a Fish Room

There was a lot of discussion “On not having an insulated garage” to keep the heat down in you “Fish Room Garage”., at the TBA Meeting Last night May 12, 2014. I have my fish room in my two car garage with almost 100 tanks. It wasn’t that hard or expensive to heat & Air condition my garage. I did not insulate it for the fish room but a home based computer repair business, after I closed my shop of 10 years.
All I did was check the garage for insulation, which it had none. I went and bought bags of rock wool and spread about 6 inches on top of the ceiling. AH! there lies a problem if you don’t have a garage that has a ceiling, mine did. There is a solution for insulation this type of ceiling in your garage if you don’t have a ceiling.
I then tackled the aluminum 2 car door. I used 2″ Styrofoam Insulation from “Loews” . It wasn’t that expensive I can’t remember how much but I think (2)4 x 8 sheets did it all with some left over. It fits right in the metal bracing that make the door itself. After placing the foam I used aluminum reflective tape used to seal duct work for HVAC system, to seal the cracks between the foam and the metal door frame. Again you can buy it at “Loews” cheap (can’t remember price). In order to get into the garage after permanently shutting the door (I can still open it in an emergency), buy removing a few hanging things inside the garage. It’s heavy but I can still lift up the door if necessary.
Now for Air Conditioning and Heating: I went to “Loews” again and purchased 2 sheet metal duct adapters, I think they are 8″, also (2) lengths of aluminum flexible insulation duct hose and it come in lengths and can be cut and attached to the adapters. I them cut 2 holes after locating the positions that I would cut the duct adapter in and 2 registers to close off the vent. These also required a ceiling adapter to connect the AC hose to from the main system adapter. Hooking it up in’t that complicated and it really cools the garage, without all the aquariums in it.
The outer wall of my garage are concrete block on one side and wood Vinyl siding on the other, with sheet rock interior. Neither wall is insulated just empty walls with no insulation, but heat rises and the concrete keeps cool most of the summer with the added ceiling insulation and the AC dusts. I also added a steel insulated door in the stud side of the garage to go in and out, a drain through the concrete wall which is hooked up to my wet sink to drain waste water outside and an exhaust blower in one of the window panes (I had from the computer repair business) it fit perfectly in the window with the glass removed. It was necessary to remove the extra humidity from having the fish tanks present, I was having a mold problem and that solved it.  It would be too labor intensive and expensive to insulate the walls at this time. I might in the future rip of the sheet rock next to the door and insulate the stud walls.
Speaking of the glass windows, I had to use 3/4″ insulation on them instead of 2″ foam. The glass takes up much of the space in the windows. I though I was going to leave them as windows but the afternoon sun heated the garage up so much that I was defeating the whole purpose of the AC. So I blocked them off with 3/4″ foil Backed foam insulation. I put the foil to the outside to reflect the heat and then painted the outside of the windows white to match the garage door front. I use fusion paint and cleaned the glass with soap and water and then cleaned the outside with Acetone to make sure the Fusion Paint would stick to the glass with a very clean window.
Oh by the way that’s how I clean and paint all my tanks using fusion paint from Wal-Mart $ 4.49 per can. It does about (3) 10 gallon tanks (Blue, Black or Red) bottom. (2) sides and back. I do all my tanks like this its easier than trying to put backings on all of them. It’s much better than roll on or brush on paint that you buy at Wal-Mart. It peals to easily and if it gets wet “DUH” in make a mess. Back to the garage , in the winter because I have a Heat Pump AC/H system I get heat from the house and if it get real cold, which it has I run a small electric ceramic heater to supplement the house heat. It works fine now that I have almost 100 tanks. The added water and heat from the tanks storing it (heat from Water),  plus the individual tank heaters (not all tanks have them) My summer high range is 76 degrees and usually winter is 70 degrees.
If anyone need help in planning his or her garage retrofit I would be willing to consult for FREE, either in person , through email or through the forum. Each garage is different and can pose different problems, for different installations. I used to be a Facilities Supervisor for a school District in Mass., a Water Purification Specialist in the filed of Reagent grade water, who supplied pure water to MIT, Harvard Med, etc also I owned my own laboratory animal supply facilities specializing in rabbits and guinea pigs, for over 15 years and sold it to a major corporation (Bausch & Lomb) in 1988. Since then I have been a facilities supervisor for Mass General Hospital, Animal Care facilities which had a large research aquarium facilities, transgenic Mouse facilities, and Mini-swine facilities who supplied the heart valve for John Wayne. I was also a Computer Aided Design Specialist for Laboratory Animal Facilities and designed Stainless steel cages and large animal facilities infrastructures all over the US. So I do have some qualification that can help you, maybe fix your garage so it doesn’t over heat! If you would like to come and see my fish room let me know. Oh yeah I am in Zephyrhills, FL, just outside of Tampa, in Pasco county, near Polk County and Lakeland. Email me and I will give you my address. Attached is a picture of my fish room garage. Ron Bows rcbows@gmail.com (813)862-3069 or Contact me on the forum

Modify message


“2014 Fish Room Renovations”

I am currently renovating my fish room. Trying to economize on my electric bill and increase tank numbers. I currently have about 75 tanks and am pushing towards 100. I need to buy a Garden shed to put all the junk I have, in the other half of my garage. I call it junk, but its all my tools, craftsman tool box, work bench and parts storage bins. Its also my garden & lawn tools storage. It’s become very difficult to run the fish room properly with all that “junk” mulling around. My plan is to move it out to the storage building and set up more racks with a smaller work station to box and ship fish. Some of the planned renovations are as follows:

ImageNEW AP-100 Supreme Air Pump and remove (4) old air pumps and increase the size of the room air loop to accommodated the new pump. – Completed – Part 1


ImageNEW Wet Sink – Fish Room Renovations – Completed – Part 2


ImageNEW UV recirculating system and Re-plumb all incoming waterlines.Completed Part 3


ImageInstall in new loop 50 more Plastic air valves purchased from the FFTFA Coop Store.


Image

“2nd Rack Built”

Image

“1st Rack Built”

Rearrange current tank racks to increase efficiency throughout the fish room.